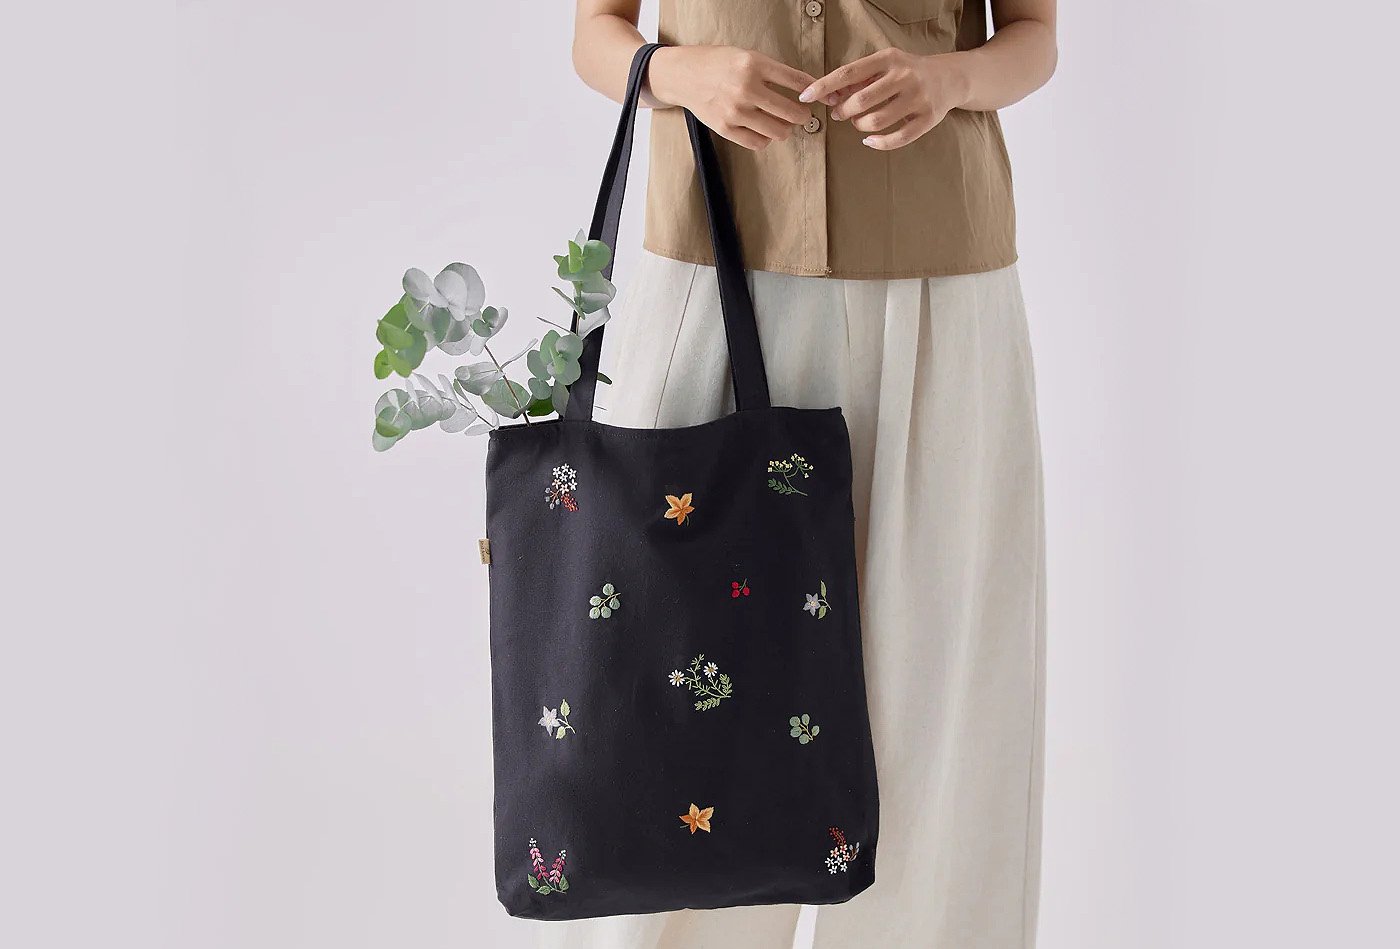
You want a premium look for your custom tote bags1, but standard printing sometimes feels cheap. Fading logos hurt your brand image2. Embroidery offers the durable, high-quality finish your clients demand.
Embroidery on a custom tote bag involves digitizing your logo into a stitch file3, then using an automated machine to stitch threads directly onto the fabric. It uses backing material for stability4. This method creates a textured, permanent design5 that outlasts screen printing and adds perceived value to the product.
Many buyers think embroidery is just sewing a picture. It is actually a technical process. I have seen many errors in production. You need to understand the details to avoid mistakes. Let us look at how it works.
What Is Embroidery on a Custom Tote Bag, and How Is It Made?
You might worry that the logo will look messy or distorted. Bad stitching ruins the bag's value. We follow a strict process to ensure every stitch is perfect.
Embroidery is made by converting artwork into a digital tape file6. A machine reads this file and stitches the design using specific thread colors. We apply a stabilizer backing to the fabric to prevent puckering7. Finally, we trim excess threads for a clean look.
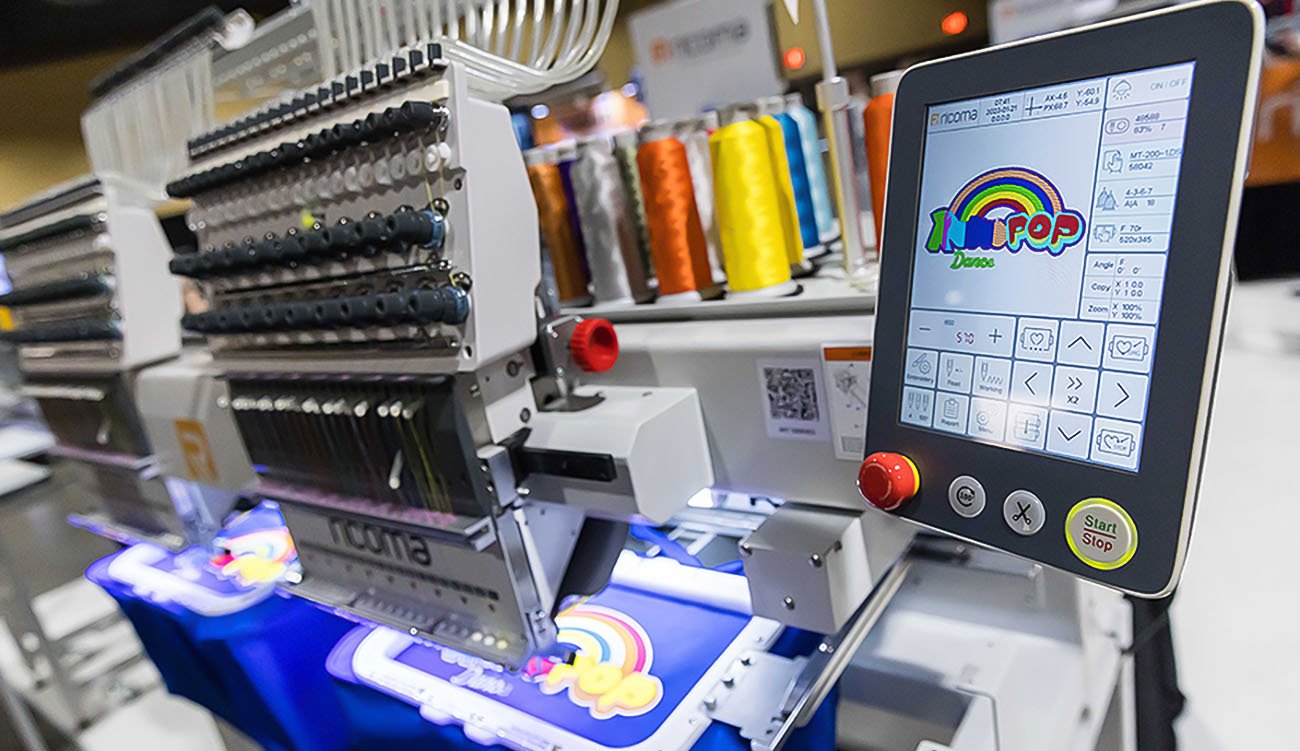
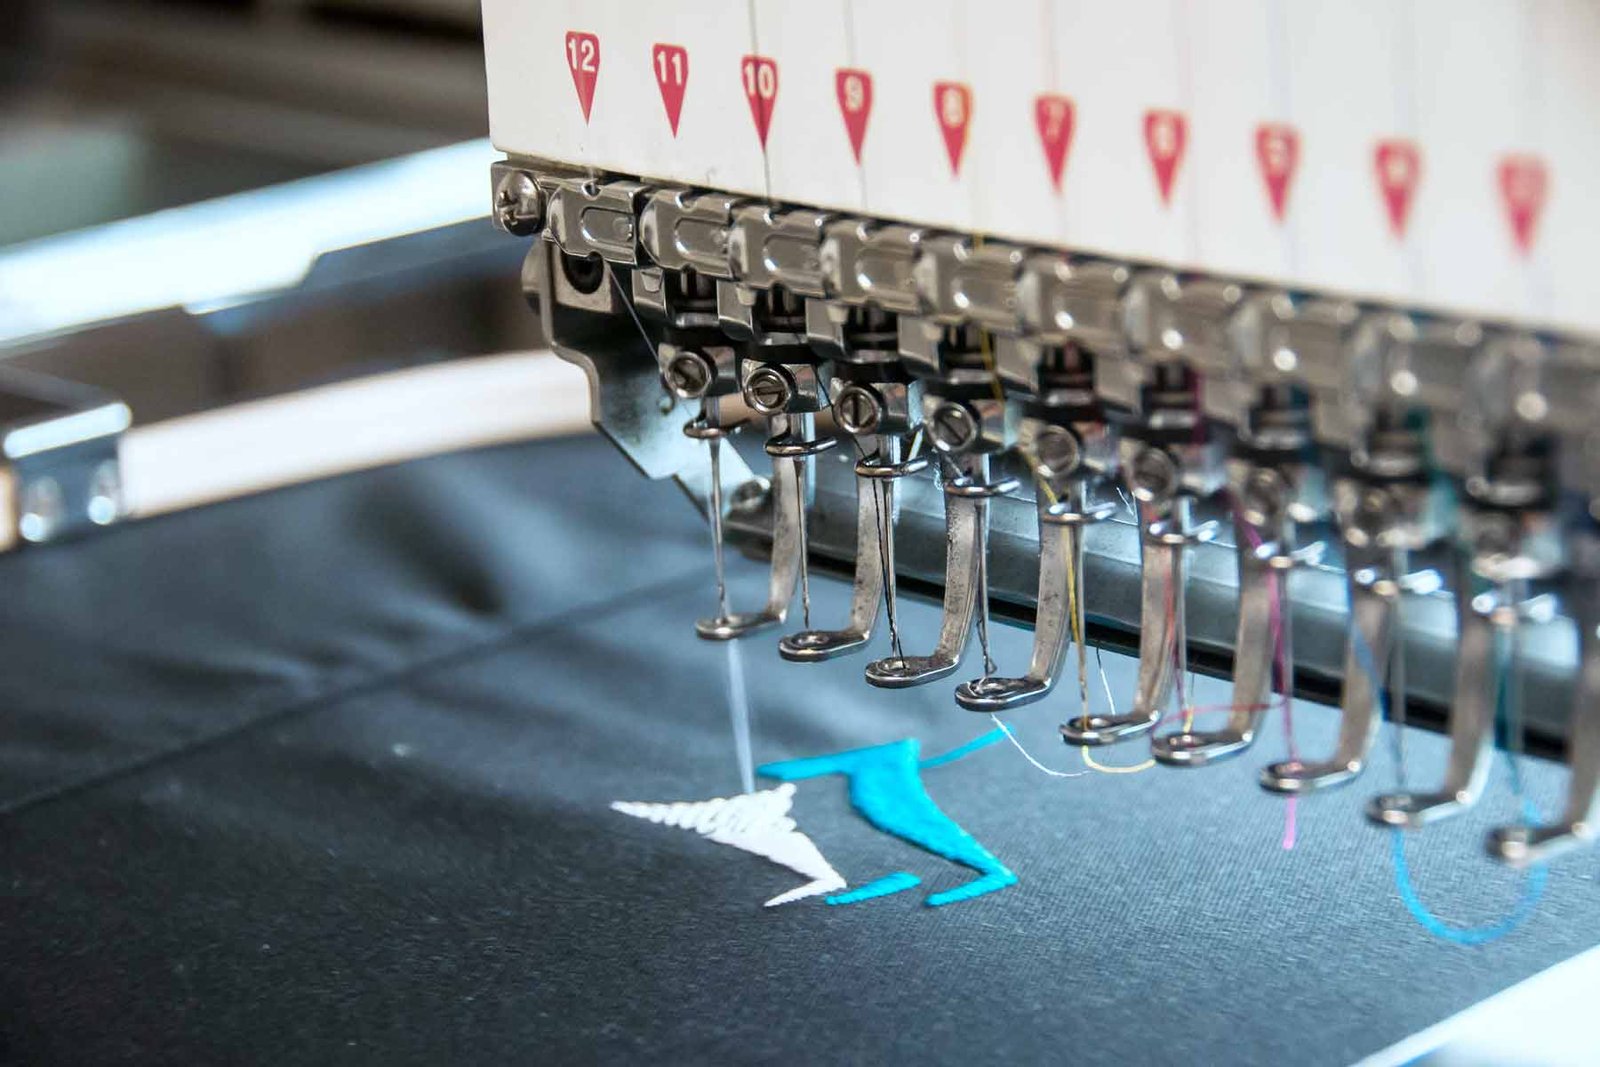
At Coraggio, I explain this process to every new buyer. It is not like printing a photo from a computer. The first step is "digitizing." We take your logo and create a special file. In the industry, we call this a "tape" or a stitch file. This file tells the embroidery machine exactly where to put the needle. It controls the X and Y axis.
The machine needs to know the density of the stitches. If the stitches are too close together, the needle will cut the fabric. If the stitches are too far apart, you will see the bag material through the logo. This looks cheap. We must find the perfect balance.
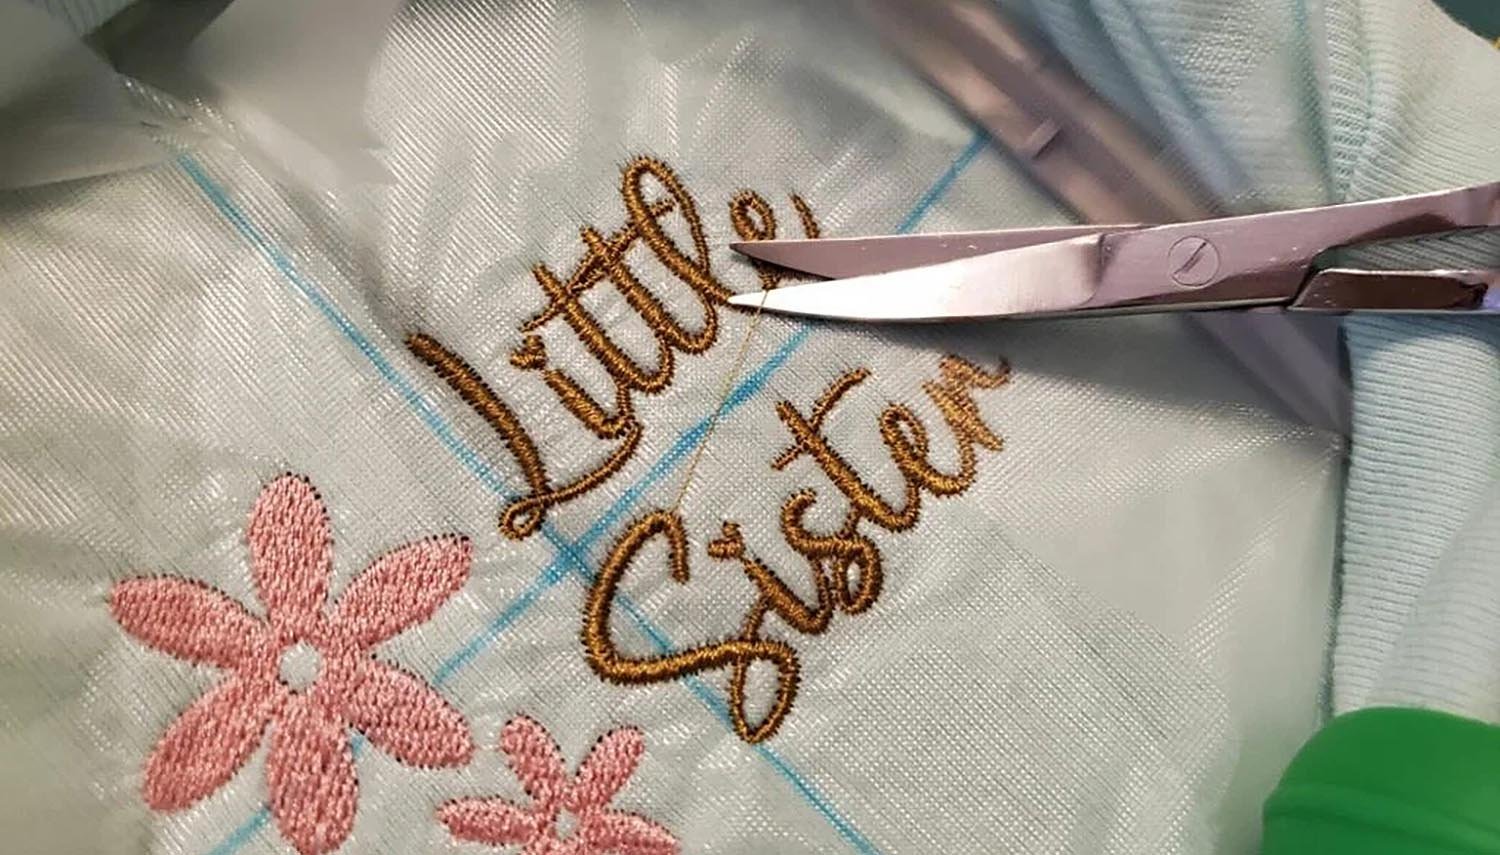
Before we start stitching, we place a piece of "backing" or "stabilizer" behind the fabric. This is a paper-like or fabric-like material. It keeps the tote bag fabric stiff. If we do not use backing, the fabric will move. The logo will look twisted. The machine holds the bag in a plastic hoop. The needle moves very fast, up and down. It changes thread colors automatically based on the program. After the machine finishes, my workers must cut the extra threads by hand.
The Embroidery Production Steps
| Step | Action | Purpose |
|---|---|---|
| 1. Digitizing | Create the "Tape" file. | Converts image to needle paths. |
| 2. Hooping8 | Lock fabric and backing in a frame. | Keeps tension tight and prevents movement. |
| 3. Stitching | Machine runs the program. | Applies the thread to the bag. |
| 4. Trimming | Cut jump stitches and loose ends. | Cleans up the design for a professional look. |
Which Fabrics Work Best for Custom Tote Bag Embroidery?
Thin fabrics rip easily under the needle's speed. You do not want holes in your new bags. Choosing the right material is the first step to success.
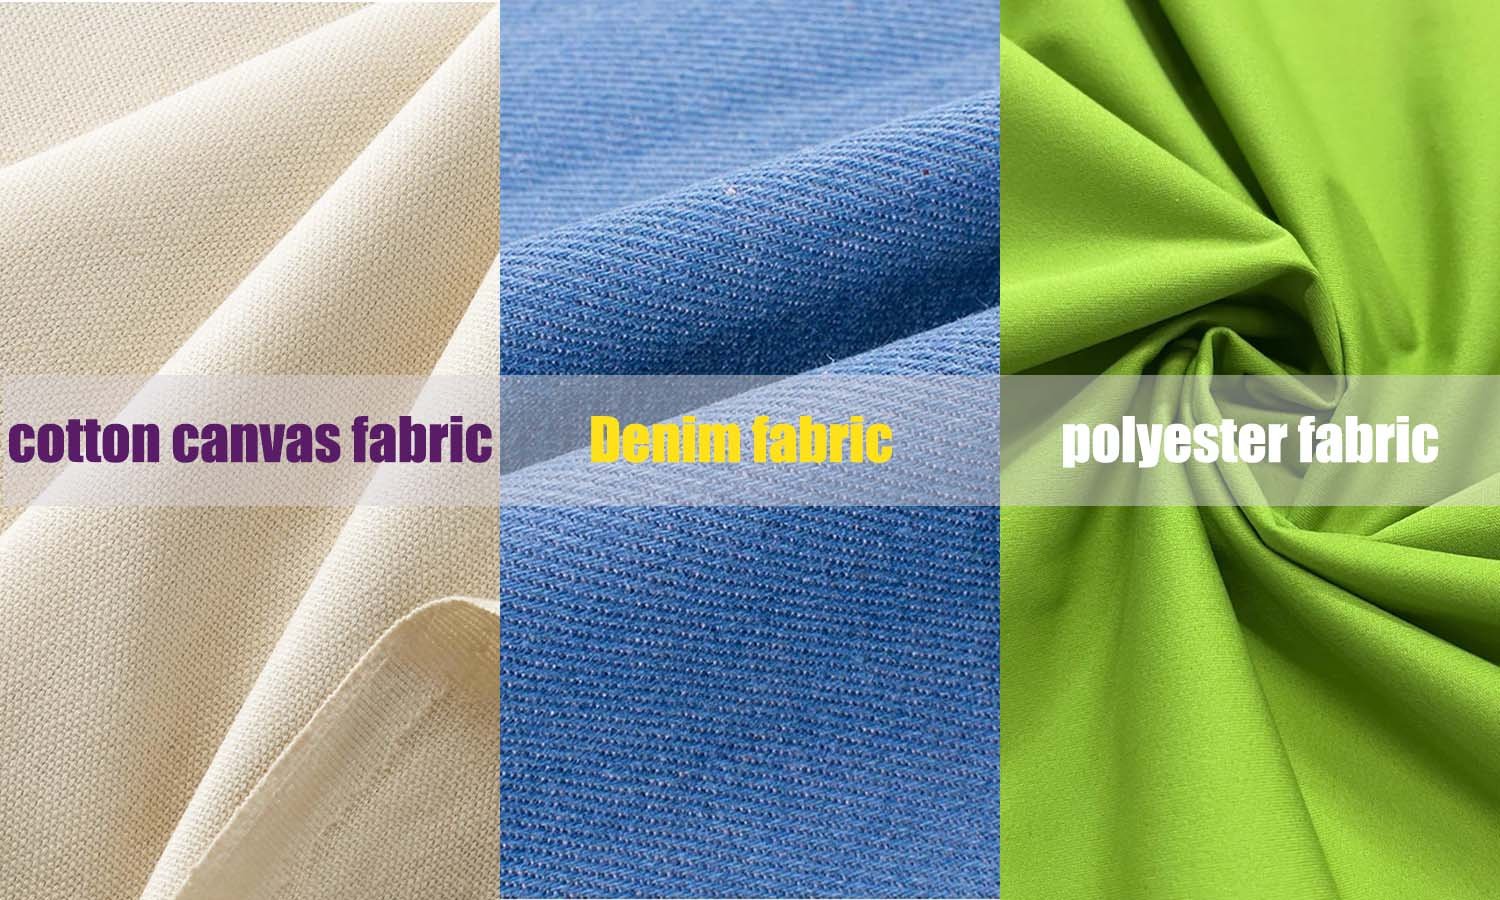
Heavyweight fabrics like cotton canvas, denim, and thick polyester9 are best for embroidery. They support the tension of the thread without tearing or puckering7. Avoid very thin nylon or lightweight cotton sheeting, as these materials cannot hold the high stitch count required for detailed logos.
I have 15 years of experience in this industry. I see buyers make mistakes with fabric selection often. You cannot embroider on everything. The embroidery needle punches thousands of holes into the bag. If the fabric is too thin, it will destroy the bag.
Cotton canvas is the best choice10. I recommend a weight of at least 10oz or 12oz. The weave of the canvas is tight. It holds the thread well. When the machine pulls the thread tight, the canvas does not wrinkle. We call these wrinkles "puckering7." Puckering happens when the thread is stronger than the fabric.
Polyester works well if it is thick, like 600D Oxford cloth11. But thin polyester or nylon is difficult. The needle creates large holes in these fabrics. The fabric might slip in the hoop. If you really need a thin bag with embroidery, we must use a very heavy backing. But this makes the logo area feel stiff and hard.
Jute is another popular material. But Jute has a very rough texture. Small details in your logo will disappear into the texture of the Jute. For Jute, you need a bold, simple logo.
Fabric Suitability Guide
| Fabric Type | Weight Recommendation | Embroidery Suitability |
|---|---|---|
| Cotton Canvas | 10oz - 16oz | Excellent. Best stability and look. |
| Polyester (600D) | Heavy Duty | Good. Durable and smooth. |
| Nylon | Lightweight (190T/210D) | Poor. Prone to puckering7 and holes. |
| Jute | Heavy | Fair. Only for large, simple text. |
| Non-Woven | 80gsm | Bad. The needle will tear the material. |
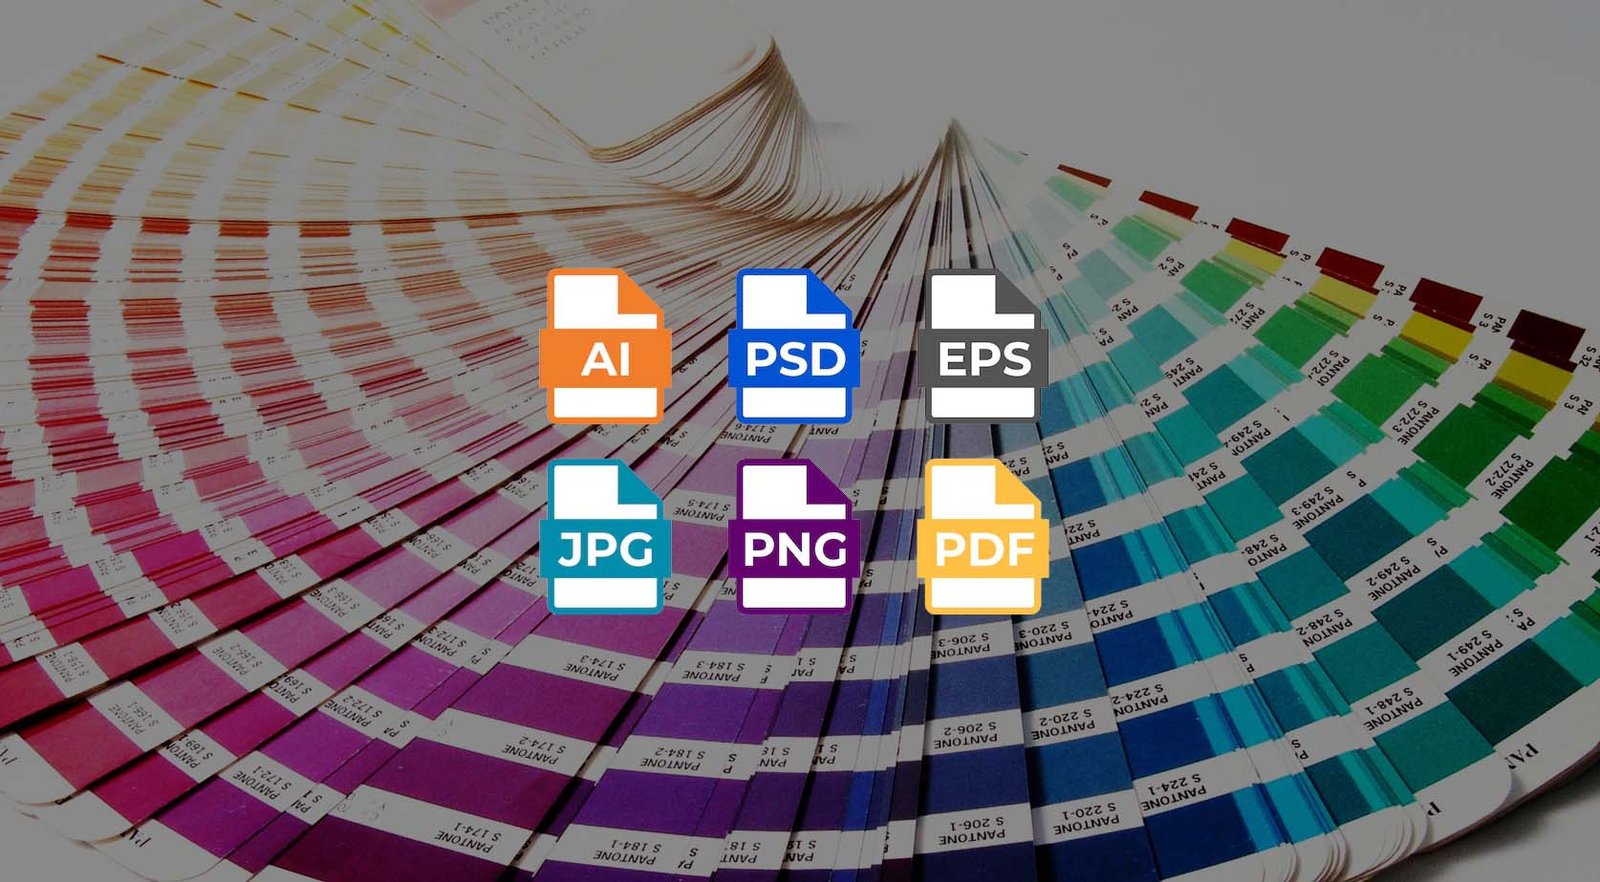
What Artwork Files Do You Need for Custom Tote Bag Embroidery?
Sending the wrong file delays your order for days. Low-quality images create blurry, ugly stitches. You need to provide the correct format to get a sharp result.
You must provide vector files like AI, EPS, or PDF for the best results. These files allow us to scale the logo without losing quality. We can use high-resolution JPG or PNG files, but vector files ensure the digitizer can map the stitches accurately for a clean finish.
My design team receives many emails with bad images. Sometimes a client sends a screenshot from a mobile phone. We cannot use this. The edges are blurry. When the digitizer tries to make the stitch file, the machine gets confused. The lines become jagged.
You should always ask your designer for the "Vector File." This is usually an AI (Adobe Illustrator) or EPS file. Vector files use math to draw lines. They are perfect at any size. If you only have a JPG, it must be very high resolution (300 DPI).
Colors are also important. Computer screens use RGB colors. Printers use CMYK. But embroidery uses actual threads. We match your colors to the Pantone (PMS) Solid Coated book12. You must tell me your Pantone codes. If you do not, I will choose the closest thread color I have. It might look different than you expect.
Also, text size has a limit. You cannot stitch text smaller than 5mm in height13. The needle and thread have a physical thickness. If the letters are too small, they become a blob of thread. You cannot read it.
File and Design Requirements
| Requirement | Specification | Why it matters |
|---|---|---|
| File Format | .AI, .EPS, .PDF (Vector) | Ensures sharp lines and accurate scaling. |
| Color Mode | Pantone (PMS) Codes | Matches thread color to your brand exactly. |
| Min Text Height | 5mm (0.2 inches) | Ensures text is legible and not a blob. |
| Line Thickness | Minimum 1mm | Prevents the line from disappearing. |
What Are the MOQ, Price Factors, and Lead Time for Embroidery?
Hidden costs can destroy your profit margin quickly. You need to know exactly what you pay for. Understanding pricing factors helps you budget your procurement effectively.
The price depends on the stitch count14, not just the number of colors. Larger, denser logos cost more. Our MOQ is typically 500 pieces for custom orders. Lead time includes 3-5 days for sampling and 20-30 days for mass production, depending on the order quantity.
Pricing for embroidery is different from printing. In silk screen printing, you pay for each color. In embroidery, the number of colors usually does not change the price. We charge based on the "Stitch Count."
Stitch count is the total number of stitches needed to make your logo. A simple outline logo might have 3,000 stitches. A solid logo of the same size might have 15,000 stitches. The machine takes longer to sew 15,000 stitches. Time is money in the factory. So, a solid design costs more than an outline design.
There is also a "Digitizing Fee15." This is a one-time setup cost to create the tape file. It is usually cheap, around $30 to $50. If your order is large, I often waive this fee.
For timing, I always suggest making a sample first16. Do not skip this. You need to see the physical bag. The photo on a screen is not enough. Sampling takes about 3 to 5 days. Once you approve the sample, mass production for 500 to 1,000 bags takes about 20 to 25 days. If you have a very complex logo with high stitch counts, it will take longer because the machines run slower.
Cost Breakdown Model
| Cost Factor | Description | Impact on Price |
|---|---|---|
| Stitch Count | Total stitches in the design. | High. More stitches = Higher price. |
| Logo Size | Physical dimensions. | High. Larger size = More stitches. |
| Complexity | Detail and fill density. | Medium. Complex art takes longer to run. |
| Colors | Number of thread colors. | Low. Usually up to 6-8 colors is same price. |
| Quantity | Total bags ordered. | High. Larger orders get lower unit price. |
How Durable Is Custom Tote Bag Embroidery, and How Do You QC It?
Loose threads make your brand look unprofessional and cheap. You cannot accept goods that fall apart. Proper quality control ensures your bags last for years.
Embroidery is extremely durable and often outlasts the bag itself17. It does not peel or fade like ink. We check quality by trimming loose threads, ensuring the backing is clean, and verifying the logo placement. We also perform wash tests to ensure the threads do not bleed color.
I believe embroidery is the most durable logo method. I have bags from 10 years ago where the fabric is old, but the embroidery is still bright. The thread is usually polyester or rayon. It is very strong. It resists bleach and sunlight.
However, the production process can be messy. The machine leaves "jump stitches." These are the threads that connect one letter to another. If the factory is lazy, they leave these threads. It looks terrible. At Coraggio, my workers trim every jump stitch by hand.
We also check the backing. The stabilizer on the inside of the bag should be cut cleanly. It should not scratch your hand when you reach into the bag.
Position is another big issue. The worker must place the bag in the hoop manually. If they are tired, the logo might be crooked. We use laser positioning guides to help. But we still inspect every bag. If a logo is tilted more than 2 degrees, we reject it.
Coraggio QC Checklist for Embroidery
| QC Point | What we look for |
|---|---|
| Thread Trimming | No loose threads or jump stitches between letters. |
| Puckering | Fabric must be flat around the logo, not wrinkled. |
| Placement | Logo must be centered and straight (level). |
| Backing | Excess backing inside the bag must be removed cleanly. |
| Color Fastness | Thread color must not bleed onto the bag fabric during washing. |
Conclusion
Embroidery creates a premium, durable finish for custom tote bags1, but it requires the right fabric and design files. You must check stitch counts and quality control. At Coraggio, we handle the technical details to ensure your brand looks perfect.
Learn how embroidered totes compare to other promo items so you can choose the most professional option for your brand campaigns. ↩
Understand why low‑quality decoration damages brand perception and how to avoid it in your merchandising strategy. ↩
See how proper digitizing impacts sharpness, consistency, and durability of your embroidered designs. ↩
Discover how stabilizers prevent puckering and distortion so your logo looks clean and professional. ↩
Explore how embroidery’s structure adds tactile value and longevity versus standard print methods. ↩
Learn the technical steps from artwork to machine‑ready file to avoid costly production errors. ↩
Identify the fabric, tension, and backing issues that lead to wrinkles so you can specify proper settings. ↩
Understand how correct hooping ensures straight, stable logos and reduces production defects. ↩
See material comparisons so you can choose fabrics that support dense stitching without tearing. ↩
Evaluate canvas weights and weave characteristics to optimize logo clarity and durability. ↩
Check how this popular polyester grade performs under high stitch counts and hoop tension. ↩
Ensure consistent brand colors worldwide by understanding thread and Pantone matching systems. ↩
Avoid illegible, blobbed text by designing within proven embroidery size limitations. ↩
Plan your budget by seeing how logo coverage and fills translate into cost per unit. ↩
Understand this setup cost so you can negotiate pricing and avoid surprise charges. ↩
Reduce risk by confirming color, size, and placement on a real bag before committing to bulk orders. ↩
See wash, abrasion, and UV performance data to justify choosing embroidery over printing. ↩