Screen print on a bag can look wrong, old, or off-brand. If I use the wrong removal method, I can ruin the fabric, fade the color, or leave ugly marks.
The safest way to remove screen printing from a bag is to start with 70% rubbing alcohol on a cotton ball1, rub gently in circles, wait 30 seconds, and wipe slowly. I always test a hidden area first because fabric, nylon, and leather react differently2.

I have seen many buyers rush this job and damage a good bag faster than the print itself. I do not like that risk. I prefer a slow method, a small test, and a clear process. That way I protect the bag, save cost, and avoid turning a simple fix into a quality problem.
What Is the Safest Method to Remove Screen Printing from a Bag?
A printed logo can make a bag unusable for resale or private label work. If I scrape too hard or use a harsh solvent3, I can ruin the bag before the print even lifts.
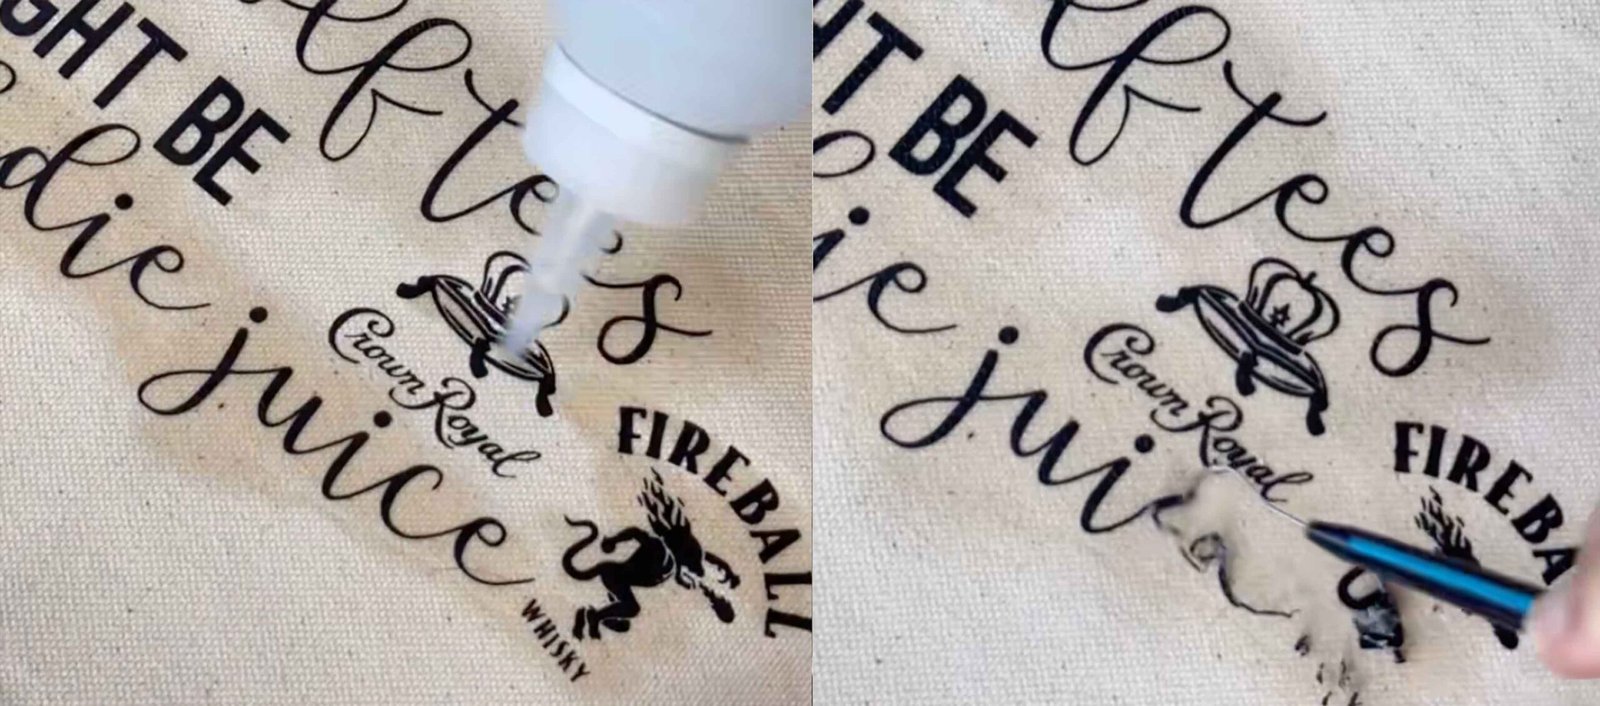
The safest method is to use a cotton ball with about 70% rubbing alcohol, apply it to the print in small circles, let it sit for 30 seconds, and wipe gently. This works well on many fabric and synthetic leather bags when tested first.
When I deal with screen printing removal, I always start with the mildest workable method. In most cases, that means medical rubbing alcohol at around 70%4. I do not pour it straight onto the bag. I put a small amount on a cotton ball or soft cloth. Then I rub the printed area in small circles5. I keep the pressure light. After that, I let the alcohol sit for about 30 seconds so it can start loosening the ink. Then I wipe slowly.
This method is popular for a simple reason. It is usually gentle enough for common bag materials like canvas, polyester, and some synthetic leather6posts/7691398987594504/)7s like canvas, polyester, and some synthetic leather. Still, I never trust a method without testing first. A hidden corner tells me a lot. If the color transfers, the finish changes, or the material becomes sticky, I stop at once.
Here is the basic way I judge safety before full removal:
| Step | What I Do | Why It Matters |
|---|---|---|
| 1 | Identify the bag material7 | Different materials react in different ways |
| 2 | Test on a hidden spot8 | Helps avoid visible damage |
| 3 | Use 70% alcohol first | Mild and common for print loosening |
| 4 | Rub with light pressure | Reduces abrasion marks |
| 5 | Wipe in stages | Gives better control |
I learned this the hard way years ago when I tried to remove a print too fast from a coated bag sample. The print came off, but the surface shine changed. Since then, I always choose control over speed.
Does Rubbing Alcohol Remove Screen Printing from Fabric Bags?
A fabric bag can hold ink deeper than it looks. If I expect one quick wipe to solve it, I may end up with a half-removed logo and a rough-looking surface9.
Yes, rubbing alcohol can remove screen printing from many fabric bags, especially canvas and polyester blends. It works by softening the ink layer so I can wipe it away gradually, but I must test first to avoid color fading or fabric change.
Rubbing alcohol is often the first thing I try on fabric bags because it is easy to find and usually less aggressive than stronger removers. Still, “fabric” is a wide word. A heavy canvas tote and a light polyester drawstring bag do not react in the same way. Some prints sit on top of the fabric. Some sink deeper into the surface. That changes the result.
When I work on fabric, I look at three things first: the weave, the dye stability, and the print thickness. A dense canvas bag can often handle slow rubbing better than a thin promotional bag. A dark dyed bag can also show fading faster if the dye is not stable. So I go slowly and check the cloth after each round.
If alcohol alone does not do enough, I may repeat the process several times. I do not scrub hard. Hard rubbing can rough up fibers and create a lighter patch. In some cases, a non-acetone nail polish remover10 may help, but I only try that after a hidden-area test. I am careful because stronger liquid can remove not only the print but also the bag finish.
Here is how I compare common fabric cases:
| Fabric Type | Alcohol Result | Main Risk | My Advice |
|---|---|---|---|
| Canvas | Often good | Slight fading if overworked | Use soft cloth and repeat slowly |
| Polyester | Usually fair to good | Surface shine change | Test first and use light pressure |
| Cotton blend | Good in many cases | Fiber fuzzing | Do not scrub hard |
| Thin promo fabric | Mixed | Distortion or stain spread | Use very small test area |
In my own work, I have found that patience matters more than force11. If I need three light rounds instead of one rough round, I take the slower path every time.
Can You Remove Logo Printing from a Bag Without Leaving Marks?
Many people want the logo gone with no trace at all. That sounds simple, but a removed print can still leave a shadow, a gloss change, or a color difference.
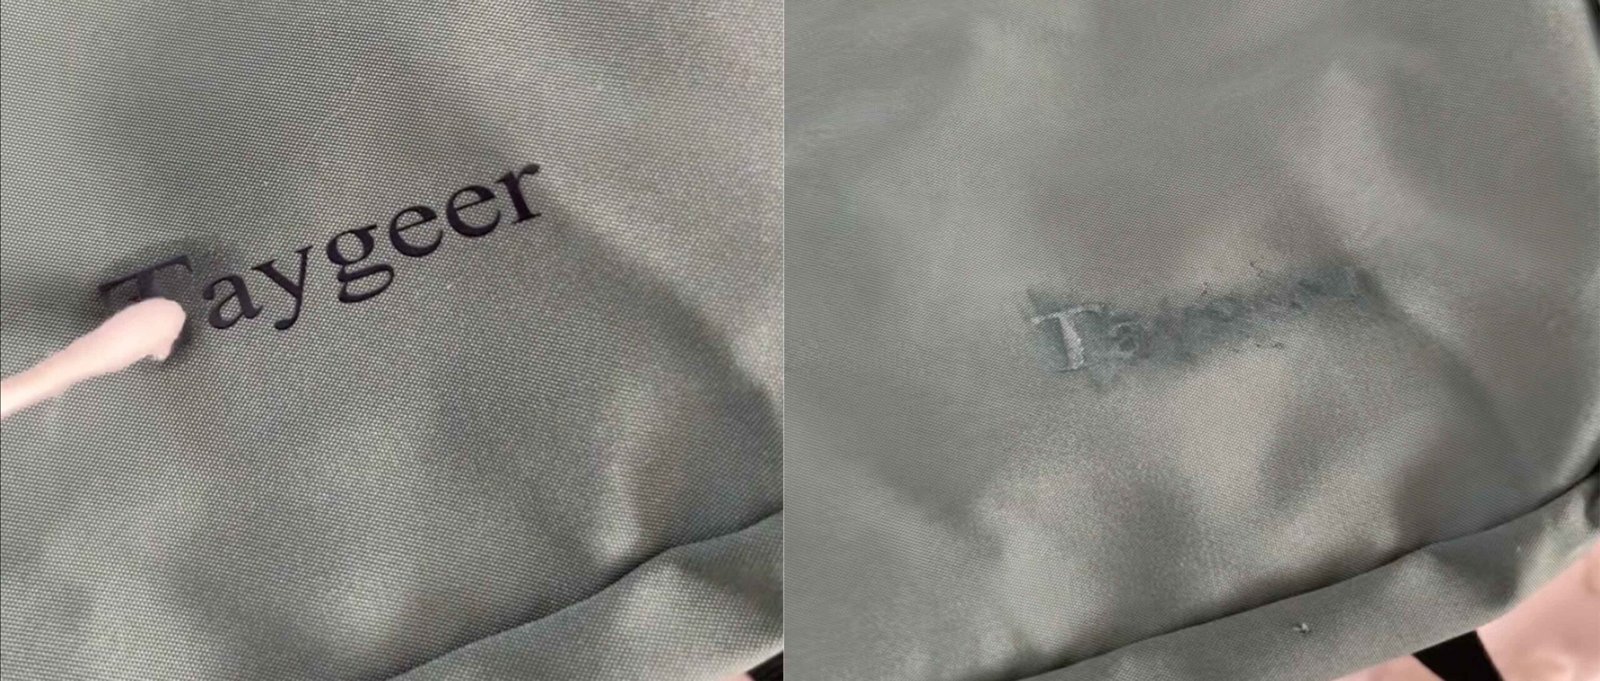
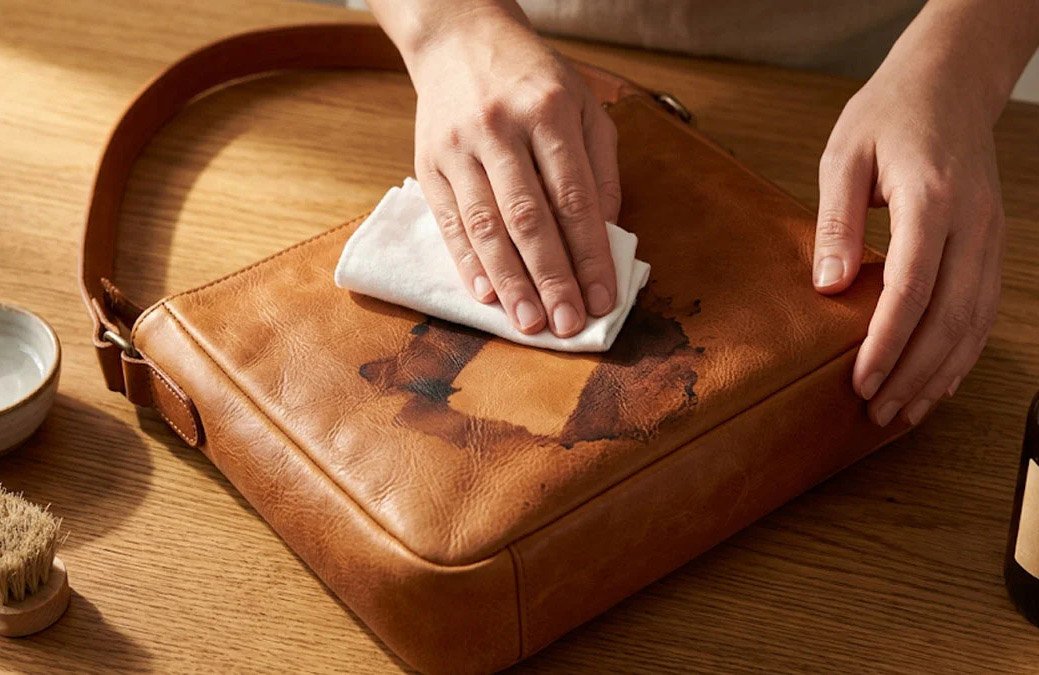
Yes, I can sometimes remove logo printing without obvious marks12, but the result depends on the bag material7, ink type, age of the print, and removal method. Gentle solvent use, low heat, and spot testing give the best chance of a clean finish.
![]()
I think this is the question that matters most to buyers and brand owners. They do not just want the print removed. They want the bag to still look sellable. That goal is possible in many cases, but not in all cases. I always set the expectation first. If the print has been on the bag for a long time, the area under it may have aged differently from the rest of the surface. The logo may come off, but a “ghost mark13” may stay.
There are a few reasons this happens. Sunlight can fade the exposed area around the logo. Dirt can collect on the unprinted parts. A coating can also age unevenly. So even perfect ink removal may not make the surface look fully uniform.
That is why I use a process that aims to reduce marks, not just remove ink. I start with a mild method. I stop often and inspect the area under normal light. I avoid metal scrapers. I use a plastic scraper14 only when the print has softened and only with a very light hand. If the print is stubborn, I may use heat from a heat gun or steam iron15, but only at controlled temperature.
These factors affect whether marks remain:
| Factor | Low Risk | High Risk |
|---|---|---|
| Print age | Newer print | Old, cured print |
| Bag surface | Smooth, stable | Coated, delicate, faded |
| Ink thickness | Thin layer | Thick logo build |
| Removal speed | Slow and careful | Fast and rough |
| Tool choice | Cotton cloth, plastic scraper14 | Metal blade, hard brush |
I once worked on a private label sample bag where the logo came off cleanly, but the gloss level changed under direct light. From a normal angle it looked fine. Under bright inspection it showed a patch. That taught me to check from more than one angle before I call the job finished.
What Tools Do You Need to Remove Screen Print from Leather or Nylon Bags?
Using the wrong tool on leather or nylon can do more damage than the print itself. A sharp edge, too much heat, or a strong solvent can scar the bag in seconds.
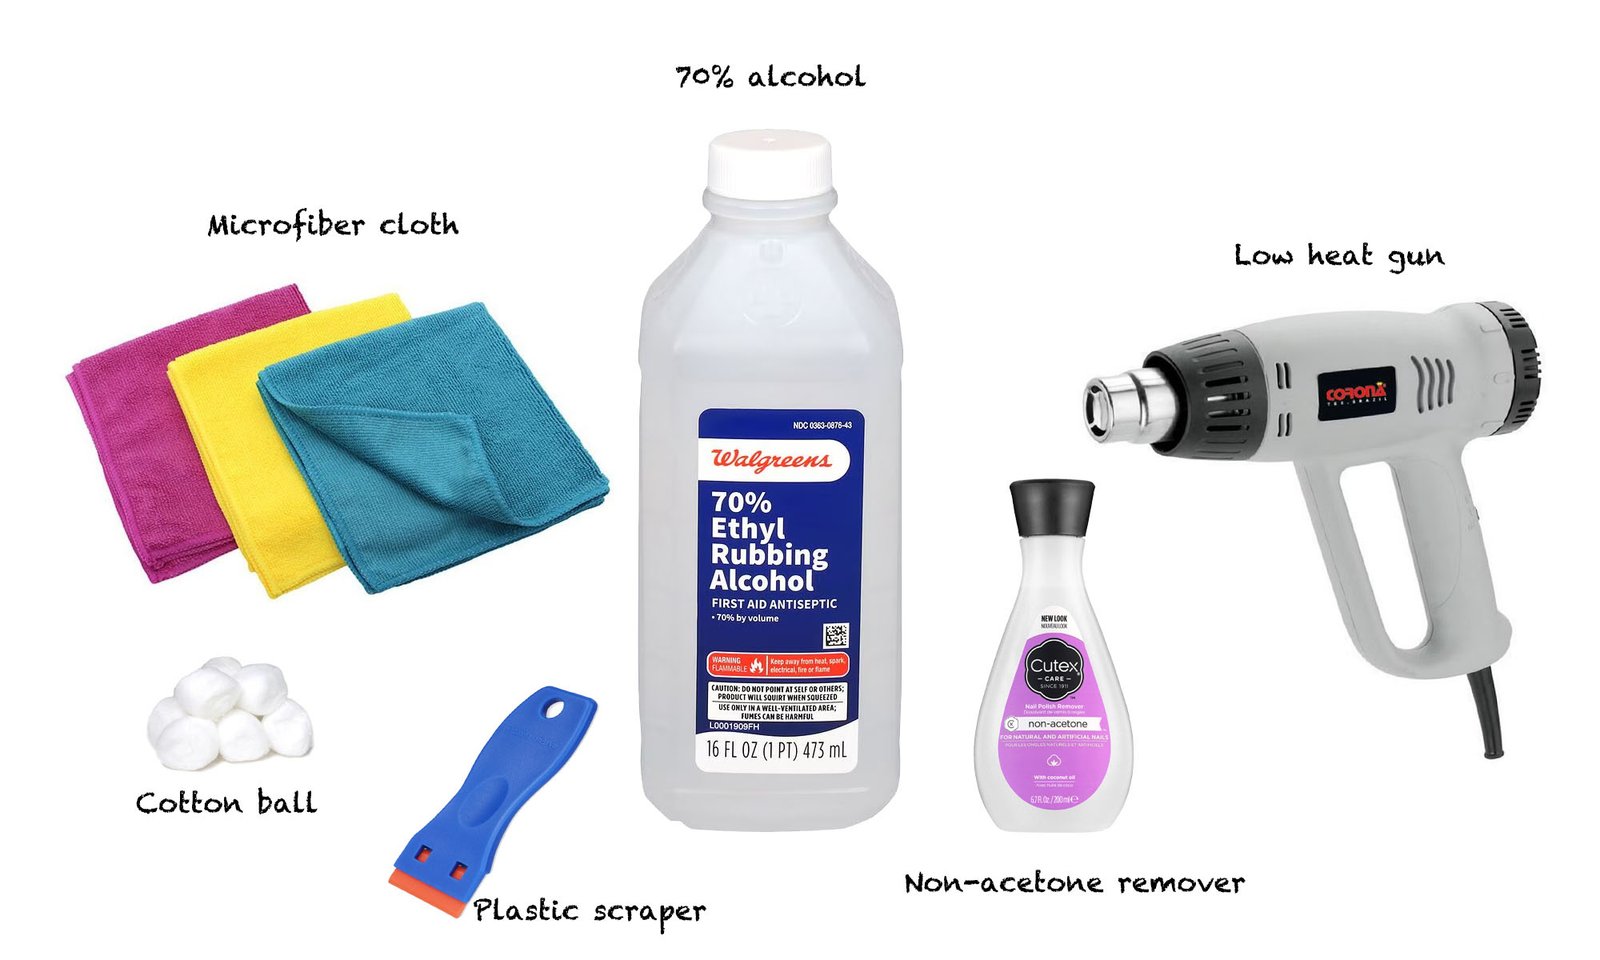
For leather or nylon bags, I use soft cotton balls, microfiber cloths16, 70% rubbing alcohol, non-acetone remover for tougher prints, a plastic scraper14, and controlled low heat when needed. I avoid metal tools and always test first.
Leather and nylon need more care than many people expect. Even when a bag looks tough, the surface finish can be sensitive. Nylon can wrinkle, glaze, or melt if heat is too high. Leather can lose color, dry out, or become shiny in a bad way if I use the wrong chemical or too much pressure. So my tool kit stays simple and controlled.
My basic tools are not expensive. I use cotton balls for targeted application. I use a microfiber cloth for wiping because it is soft and does not leave much lint. I keep 70% rubbing alcohol ready as the first choice. If that does not work well, I may test a non-acetone nail polish remover10 on a hidden area. For lifted print, I use a plastic scraper14 or even a plastic card edge. I never start with a metal blade. If heat is needed, I use a heat gun on low or a steam iron with a barrier cloth.
Here is the tool list I trust most:
| Tool | Use | Best For | Warning |
|---|---|---|---|
| Cotton ball | Apply solvent | Small print areas | Do not soak the bag |
| Microfiber cloth | Wipe softened ink | Most surfaces | Keep cloth clean |
| 70% alcohol | First-step remover | Fabric, some PU, nylon | Test hidden spot |
| Non-acetone remover | Stronger backup | Stubborn print | Test carefully |
| Plastic scraper | Lift softened ink | Thick print | Use very light pressure |
| Low heat gun / steam iron | Soften cured ink | Tough prints | Control temperature |
I keep the process calm and clean. I work in a ventilated area. I protect the table. I do not mix chemicals. If I feel uncertain about real leather, I stop and test more. In production and sourcing, the cheapest mistake is the one I avoid before it happens.
How Do You Test If a Removal Method Is Safe for Your Bag Material?
A bag may look strong on the outside, but coatings, dyes, and finishes can react badly. If I skip testing, I may not notice damage until it is too late.
To test safety, I apply a small amount of the chosen remover on a hidden area, wait 30 to 60 seconds, wipe gently, and check for color transfer, surface change, stickiness, or shine loss17 before treating the printed area.
Testing is the part many people want to skip, yet it is the part that saves the bag. I treat testing like a quality check. I choose a hidden place first. That can be the inside seam, the bottom panel edge, or the back side near hardware. Then I apply a tiny amount of the removal liquid with a cotton swab or cotton ball. I do not soak the area. I wait for 30 to 60 seconds. Then I wipe gently.
After that, I inspect closely. I look for color on the cloth. I look for dullness, gloss change, swelling, stickiness, wrinkling, or hardening. I also touch the area lightly after it dries. Some surfaces look fine at first but feel different later. If there is any bad sign, I do not continue with that method.
I also compare materials before I test because each one has its own weak points:
| Material | What I Check During Test | Common Risk |
|---|---|---|
| Canvas | Dye transfer, fiber roughness | Fading or fuzzing |
| Nylon | Shine change, warping | Heat or solvent damage |
| PU leather18 | Surface tack, peeling | Coating breakdown |
| Real leather | Color lift, dryness | Finish damage |
| Polyester | Texture shift, color loss | Surface marking |
My simple test routine looks like this:
- Identify the material as clearly as I can.
- Pick the mildest remover first.
- Test a hidden area.
- Wait and wipe gently.
- Check sight and touch.
- Repeat only if the surface stays stable.
I follow this rule in bag sourcing too. A bag is not only a product sample. It is a surface with layers, coatings, and finishing work. If I respect that, I make fewer mistakes and get a better final result.
Conclusion
I remove screen printing safely by starting mild, testing first, and working slowly. In my experience, patience protects the bag better than force ever will.
Understand why this exact alcohol strength and applicator balance ink removal power with safety for most bag materials. ↩
See detailed material behavior so you can tailor your removal method and avoid unexpected damage on each bag type. ↩
Identify which chemicals are too aggressive so you don’t strip finishes, melt synthetics, or discolor leather surfaces. ↩
Get safety data and usage tips so you can apply medical-grade alcohol confidently and correctly on printed areas. ↩
Learn proper motion, pressure, and duration to lift ink gradually while keeping the surface smooth and mark-free. ↩
Compare how different bag materials behave so you can predict results and pick the safest method for each one. ↩
Learn how material composition dictates what heat, pressure, and chemicals your bag can safely tolerate. ↩
Follow a step‑by‑step testing routine to catch problems early and avoid ruining visible areas of your bag. ↩
Discover complete removal strategies to avoid ghost logos, texture damage, and unsellable-looking results. ↩
Explore when to step up from alcohol to non-acetone remover without crossing the line into damaging the bag. ↩
See case-based explanations showing how slow, gentle methods protect bag quality better than aggressive scrubbing. ↩
Set realistic expectations and learn what conditions must line up to achieve a nearly invisible removal result. ↩
Understand why shadows or outlines remain after ink removal and what you can realistically do to minimize them. ↩
Get guidance on angles, pressure, and timing so you can remove raised ink layers without scratching the surface. ↩
See how controlled heat softens cured ink and learn safe temperature ranges to avoid melting or scorching. ↩
Find out how microfiber reduces scratching, lint, and streaks, giving a cleaner finish on delicate surfaces. ↩
Learn to read these warning signs so you can stop early and switch methods before permanent damage occurs. ↩
Understand PU’s coating structure so you can avoid peeling, tackiness, and surface breakdown during cleaning. ↩